- Step 1: Assess the Situation & Identify the Bees
- Step 2: Safety First — Secure the Area
- Step 3: Prepare for the Pro — Gather Essential Info
- Step 4: Evaluate & Select Your Bee Removal Service
- Step 5: Prepare Your Home for the Bee Removal Visit
- Understanding the Cost of Bee Removal
- Frequently Asked Questions
You notice a buzzing sound near your eaves, or you see a steady stream of insects entering a crack in your siding. Your heart sinks a little — you’ve got bees. The immediate impulse is to panic and call someone immediately. But rushing the process can lead to poor decisions, higher costs, and even incomplete removal. A methodical approach is your best defense. This bee removal checklist gives you five critical steps to take before you dial any service provider. These steps empower you to assess the situation accurately, ensure everyone's safety, and gather the information necessary to hire the right professional for an effective, permanent solution.
The goal isn’t just removal; it’s responsible and complete removal. Many companies offer quick extermination, but for honeybees, that’s an ecological loss and can leave behind a mess that attracts new pests. Proper bee removal involves extracting the colony, often relocating it, and thoroughly cleaning the site to prevent recurrence. Taking these preliminary steps turns you from a frantic homeowner into an informed client, which leads to better service, fairer pricing, and a guaranteed result. Let’s walk through what you need to do.
Step 1: Assess the Situation & Identify the Bees
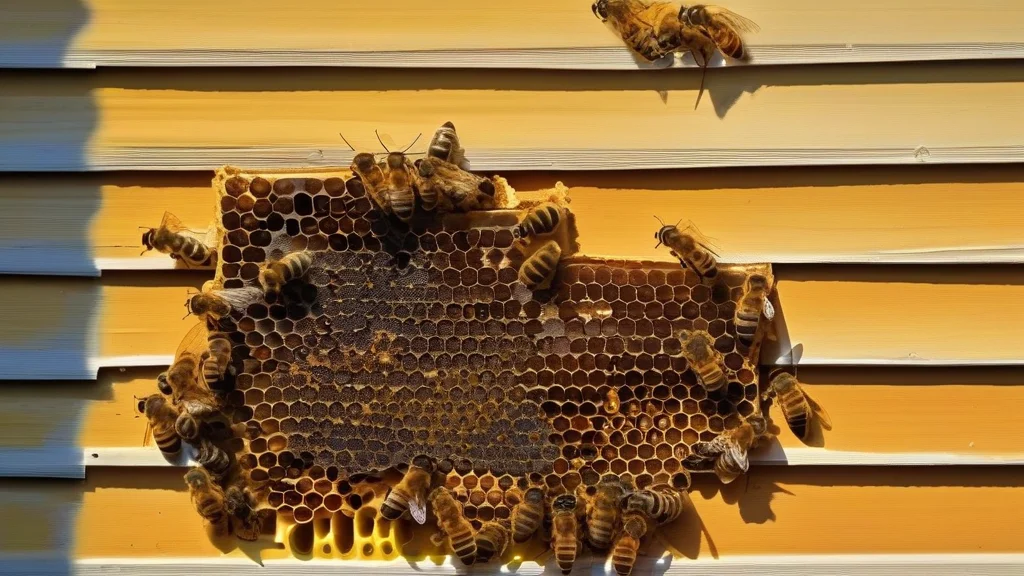
Not all buzzing insects are bees, and not all bees require the same removal approach. Your first task is to become a casual observer. Watch the entry point from a safe distance for five to ten minutes. Look at the insects’ size, color, and flight pattern. This initial identification is crucial because it dictates the urgency, method, and even the type of professional you need to call.
Honeybees are generally golden-brown with fuzzy bodies and are less aggressive when undisturbed. They’re vital pollinators, and many ethical removal services will attempt to relocate the hive to a local apiary. Bumblebees are larger, black and yellow, and often nest in ground cavities or compost piles. Carpenter bees are solitary, look similar to bumblebees but have shiny, black abdomens, and bore into wood, causing structural damage. Wasps and hornets are smoother, more aggressive, and often require extermination rather than relocation. Misidentifying can mean hiring a company with the wrong specialty.
Important
Never attempt to get close enough to disturb the nest or swarm. Your observation should be visual only from several feet away. If you see aggressive diving or swarming behavior, you likely have wasps or hornets, and the situation requires more urgent, cautious handling.
Also, try to estimate the scale. Is it a small cluster under a deck board, or a massive colony filling your entire wall void? Listen for the volume of buzzing. Look for the number of bees entering and exiting per minute. A high traffic flow indicates a large, established colony. This size assessment will be your first piece of data for the removal company, helping them quote accurately and prepare appropriately.
Correct identification (honeybee vs. wasp) and a rough size estimate are the two most valuable pieces of information you can provide to a bee removal service upfront, saving time and ensuring they bring the right tools and approach.
Common Bee Types and Removal Implications
Understanding the basic types helps you communicate effectively with professionals. Here’s a quick guide:
- Honeybees — Typically nest in cavities (walls, attics, chimneys). Removal involves live extraction and relocation. Expect higher costs due to the careful process.
- Bumblebees — Often ground-based. Removal is simpler but may involve excavation. They are generally docile.
- Carpenter Bees — Bore into wooden structures. Removal requires insecticide and sealing of drill holes to prevent recurrence. Focus on repair.
- Wasps & Hornets — Build papery nests in eaves, shrubs, or attics. Usually require extermination and nest destruction. Higher urgency due to aggression.
Once you’ve made a preliminary identification, you can move to the next critical step: securing the area to prevent any accidents or escalation.
Step 2: Safety First — Secure the Area
Your safety and that of your family, pets, and neighbors is the absolute priority. Even docile honeybees will defend their hive if provoked. After assessing, your job is to create a temporary safety perimeter without aggravating the colony. This isn’t about DIY removal; it’s about risk management until the professionals arrive.
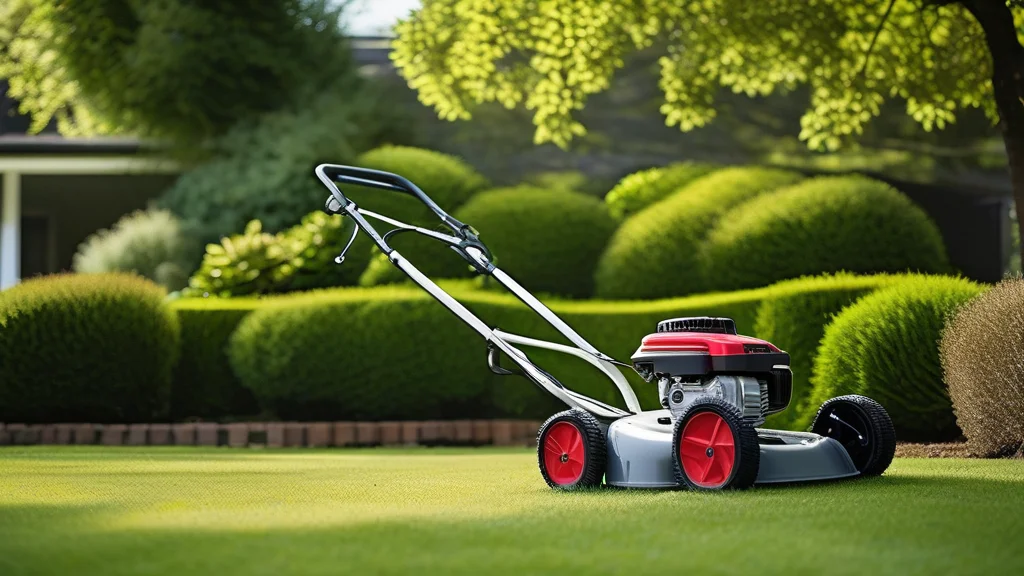
First, restrict access. If the bees are in a play area, shed, or near a frequently used door, block off that area. Use temporary barriers like a portable fence, or simply keep the door closed. Inform everyone in the household, especially children, to stay clear. If pets are curious about the buzzing, keep them indoors or in a separate yard. Second, avoid any vibrations or disturbances. Don’t mow the lawn near a ground nest, don’t hammer on a wall with an internal hive, and don’t use loud equipment nearby. Vibrations can trigger a defensive response.
If the nest entry point is in a wall, consider closing that room’s door and ventilating the house from another area. This prevents bees from accidentally entering living spaces if the colony expands internally before removal.
For particularly aggressive insects like wasps, or if the nest is in a high-traffic area, you may need to contact a service that offers emergency or same-day bee removal. Your preparedness here directly impacts the safety scenario the professional will encounter. A calm, secured site allows them to work efficiently and safely. Documenting what you’ve done also shows the company you’re a responsible client, which can foster a better working relationship.
Step 3: Prepare for the Pro — Gather Essential Info
Now you’re ready to start contacting services. But calling and saying “I have bees” is insufficient. Professionals need specific details to provide an accurate quote, gauge the required equipment, and schedule appropriately. Having this information ready streamlines the process and avoids repeat calls. It also allows you to compare quotes accurately, as each company will be pricing based on the same set of facts.
Compile a simple “bee removal briefing” for yourself. It should include:
- Location & Access Details
Where exactly is the nest? (e.g., “south-facing wall, under the eave, 15 feet up”). Is there safe access for a ladder or truck? Are there obstacles like dense shrubs or a sloped roof? Note if the area is near power lines.
- Your Identification & Observations
Share your bee type guess, size estimate, and any photos you safely took from a distance. Mention the level of activity (constant traffic vs. occasional bees).
- Property Information
Is it a single-family home, apartment, or commercial building? What is the construction material around the nest (wood siding, brick, stucco)? This affects the removal and repair method.
- Timeline & Urgency
How soon do you need it addressed? Is it an immediate danger, or can it wait a few days? Be honest about your flexibility.
Did You Know?
Many reputable bee removal companies offer free remote assessments via video call or photo review. Having your briefing ready makes this quick consultation far more productive, often yielding a firm quote without an initial site visit.
This preparation phase is where a service like HomeProMatcher becomes invaluable. Instead of cold-calling multiple companies and repeating your briefing each time, you can provide your detailed situation once. Their system matches you with local, licensed pros who are pre-screened and ready to receive your specific case details, saving you hours of phone time. One call to them connects you directly to a vetted provider prepared with your information.
Step 4: Evaluate & Select Your Bee Removal Service
With your information packet ready, you can now intelligently evaluate providers. This is where most homeowners make costly mistakes—choosing based solely on the lowest price or the fastest availability. A proper bee removal is a specialized service; the right company ensures the bees are handled responsibly, the mess is completely cleaned, and your property is repaired to prevent future invasions.
When reviewing companies, use this checklist of must-ask questions and verification steps:
- Licensing & Insurance — Ask for their state pest control or beekeeper license number. Verify they carry general liability insurance. This protects you if property damage occurs during removal.
- Methodology — Specifically ask: “Do you relocate honeybees or exterminate?” Ethical removal of honeybees is a significant differentiator. Ask how they clean the residual honey and wax (which attracts new pests) and how they seal the entry point.
- Experience & Specialization — How many years have they done bee removal? Do they specialize in wall removals, ground nests, or carpenter bees? Ask for examples of similar jobs.
- Written Quote & Guarantee — Never accept a verbal estimate. Demand a written quote detailing the work: removal, cleanup, repair, and any follow-up. Ask about a guarantee—what happens if bees return within a certain period?
- Reviews & References — Check Google, Yelp, and BBB reviews. Look for patterns: are complaints about incomplete removal or hidden costs? Ask the company for references from recent, similar jobs.
What users say
Customers consistently praise the company's commitment to saving honeybees and the thoroughness of their cleanup. Common themes include clear communication, no hidden fees, and effective sealing of entry points.
Why we picked this
This provider stands out for a holistic approach that goes beyond simple extraction. They partner with local apiaries, use specialized vacuum equipment for live removal, and include a comprehensive cleaning and repair service in their standard quote, addressing the root cause of recurrence.
- Strong ethical commitment to pollinator preservation
- Written, all-inclusive quotes with a 1-year guarantee
- Excellent communication and post-service follow-up
- Premium pricing compared to extermination-only services
- May not offer same-day service for non-emergencies
Getting at least three detailed quotes is non-negotiable. The price variation can be staggering, from a few hundred dollars to over a thousand, based on methodology, included services, and company overhead. Compare them line-by-line. A low quote that excludes cleanup and repair will likely lead to future problems and additional costs. The most expensive quote might include unnecessary services. Your prepared information allows you to compare apples to apples.
Step 5: Prepare Your Home for the Bee Removal Visit
Once you’ve selected a provider and scheduled the service, a final round of preparation ensures the job goes smoothly, quickly, and safely. This step saves the technician time, which can sometimes reduce your final bill, and minimizes disruption to your home.
First, clear the work area. If the nest is in a wall near a garden, move potted plants and garden furniture. If access is through an attic, ensure the path to the attic is clear and lights are working. Provide safe, stable parking for their truck. Second, secure pets and children. Plan to keep them in a part of the house away from the work zone or, better yet, arrange for them to be out of the home during the appointment. This eliminates distraction and safety concerns for the crew.
Take photos of the area from multiple angles before the technicians arrive. This provides a visual record of the pre-existing condition, which is helpful for insurance or if any disputes arise about property damage during the bee removal process.
Third, be ready to communicate. Have your list of questions ready for when the technician arrives. Confirm the plan: the order of operations, how long it will take, what the cleanup involves, and what you should do immediately after (like staying out of a certain room for a few hours). Finally, understand the post-service instructions. Will there be a residual odor? Should you avoid using a certain water faucet if the nest was in a pipe chase? Getting these details upfront prevents confusion later.
By completing these five steps—assessment, safety, information gathering, vendor selection, and home prep—you transform a stressful infestation into a managed project. You become an active partner in the bee removal process, leading to a higher quality outcome, a fair price, and long-term peace of mind.
Understanding the Cost of Bee Removal
Price is a major factor for homeowners, and quotes can be confusing. Bee removal costs are not standardized; they depend on a complex mix of factors. Understanding what drives the price helps you evaluate quotes intelligently and avoid being overcharged.
The primary cost drivers are the nest location and size. A small, accessible ground nest might cost $150 to $300. A large honeybee colony inside a two-story wall requiring ladder work, live extraction, and interior repair can range from $750 to $1,500. The method matters too: extermination is often cheaper than live relocation, which requires more skill and time.
Other factors include geographic region (services in metropolitan areas cost more), emergency/same-day fees, and the company’s own overhead. Always break down the quote:
| Service Component | Low-End Quote | Mid-Range Quote | High-End Quote |
|---|---|---|---|
| Basic Removal/Extermination | Included | Included | Included |
| Live Bee Relocation | Not Offered | $100–$200 extra | Included |
| Honey/Wax Cleanup | Not Included | $75–$150 extra | Included |
| Entry Point Repair & Seal | Not Included | $150–$300 extra | Included |
| Service Guarantee | None | 30 days | 1 year |
The cheapest option often excludes the critical cleanup and repair, leading to future ant, rodent, or new bee infestations. The most value-conscious choice is usually a mid-range provider that includes these services for a transparent, all-inclusive price. When using a matching service like HomeProMatcher, you can specify your preference for ethical relocation and comprehensive cleanup, ensuring the quotes you receive are from companies that align with your priorities and provide detailed breakdowns.
Watch Out
Be wary of quotes given over the phone without a visual assessment. For internal wall nests, the true extent is often hidden. A reputable company will either request photos/video or schedule a quick site visit before giving a final price. Fixed-price quotes based on remote reviews are a red flag for potential hidden charges later.
Frequently Asked Questions
Typically, no. Standard homeowners policies do not cover pest or insect removal, including bee removal. However, if the bees cause significant structural damage (like carpenter bees destroying wood), the repair costs for that damage might be covered, depending on your policy. Always check with your insurer, but expect to pay for the removal service itself.
For a standard external or accessible nest, the process can take 1 to 3 hours. For complex removals from within walls or attics, it may require 4 to 8 hours or even span two days if extensive cleanup and repair is needed. The technician should provide a time estimate during the quoting process.
For anything beyond a very small, visible, and accessible nest, DIY bee removal is strongly discouraged and often dangerous. Without proper equipment and knowledge, you risk serious stings, aggravating the colony, causing property damage, and failing to remove the hive completely—leading to rapid reinfestation. Professional removal is a specialized task.
A proper service includes post-removal cleanup to remove all honey, wax, and debris. This is vital as leftover honey attracts other pests like ants, rodents, and even new bees. Finally, the entry point must be permanently sealed with appropriate materials (not just caulk) to prevent future colonies from discovering the same cavity.
Bee activity peaks in spring and summer. Removal is possible year-round, but it’s often easier in late fall or winter when colony activity is minimal. However, if bees are inside your living spaces or pose an immediate threat, removal should happen as soon as possible, regardless of season.
Finding a reliable, ethical, and skilled bee removal service doesn’t have to involve endless online searches, blind phone calls, and comparing vague quotes. By following this checklist, you take control of the process. You assess the problem, secure your home, gather critical information, evaluate providers with a discerning eye, and prepare for a smooth service visit. This approach saves you time, money, and stress, and ensures the bees are handled responsibly and your home is protected long-term.
For homeowners who want to streamline the vendor selection step, consider using a trusted matching service. HomeProMatcher connects you with local, licensed bee removal professionals who have been pre-vetted. You provide your detailed situation assessment once, and they match you with a provider whose methodology, pricing, and guarantees align with your needs. It eliminates the hassle of cold calling and research, putting you directly in touch with a qualified expert ready to solve your problem.