What Is Fumigation?
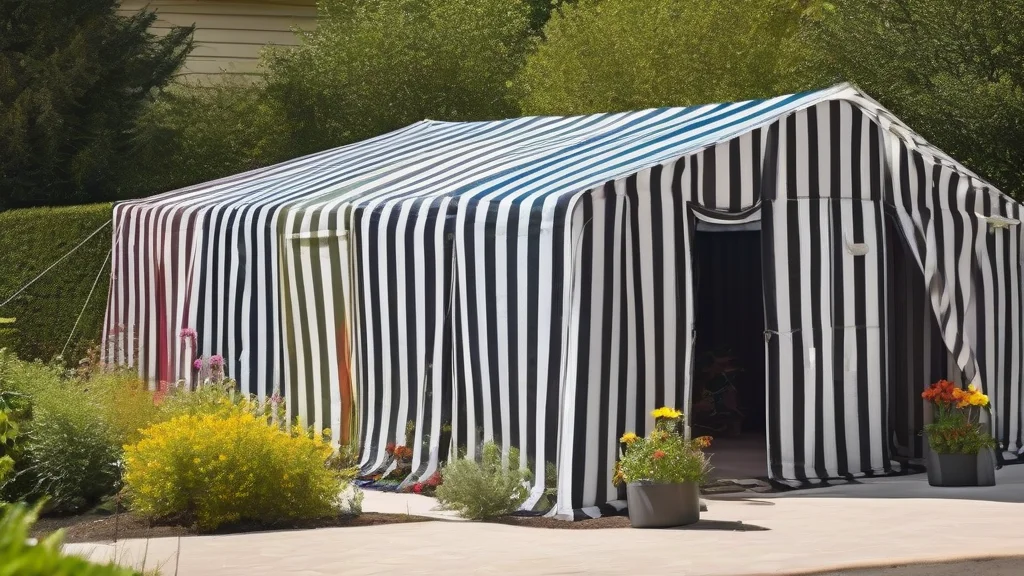
When the large, ominous tent is draped over a home, it signals a serious battle against pests. Fumigation is not a routine pest control spray; it is a whole-structure treatment using a gaseous pesticide to eradicate pervasive infestations that have penetrated the very framework of a building. This method targets pests like drywood termites, which live deep inside wood beams, or widespread cockroach colonies that have infiltrated wall voids and subflooring. Unlike localized treatments, fumigation permeates every cavity, crack, and material within the sealed structure, aiming for 100% eradication. It is often the last resort when other methods fail, representing a significant investment and disruption for homeowners.
The decision to undertake fumigation usually follows the discovery of severe structural damage or an infestation that threatens the home's integrity. The most common fumigant used is sulfuryl fluoride, marketed under names like Vikane. This gas is effective because it is odorless, colorless, and non-staining, but it is also highly toxic to all living organisms within the treated space. Consequently, the process requires meticulous planning, professional execution, and rigorous safety follow-through. The actual fumigation period typically lasts 24 to 72 hours, but the homeowner's responsibility extends far beyond the removal of the tent. The critical work—ensuring safety, effectiveness, and long-term protection—begins after the fumigation company has left.
Important
Fumigation is a regulated, dangerous process that only licensed professionals should perform. Never attempt to use fumigants yourself, and always verify your contractor's state license and insurance before work begins.
The Fumigation Process
Understanding the standard steps of a fumigation helps homeowners know what to expect and what to watch for. The process follows a strict sequence designed to maximize efficacy and safety.
- Pre-Fumigation Preparation
This is the homeowner's most active phase. You must remove all living things: people, pets, and plants. You also need to remove or properly seal all food, medicines, and certain sensitive items. The fumigator will provide a detailed checklist. Failure here can lead to contaminated items and safety hazards post-treatment.
- Tenting and Gas Introduction
The company seals the structure with special tarps, creating an airtight envelope. They then introduce the fumigant gas, which circulates for the designated period. Monitoring devices inside ensure gas concentrations reach lethal levels for pests throughout the structure.
- Aeration and Tent Removal
This is the fumigator's final on-site step. Fans and natural ventilation are used to purge the gas from the home. They use sensitive detectors to confirm gas levels have dropped to safe, legal thresholds before removing the tent and declaring the home ready for re-entry.
It's crucial to note that the fumigator's job is technically complete once aeration is verified and the tent is gone. However, their declaration of safety does not mean your home is immediately livable in a practical sense. Residual precautions and cleaning are your responsibility, and this phase is where many homeowners make mistakes.
The fumigation company ensures the gas is gone, but you must ensure your home is clean, safe, and pest-free for the long term. The post-fumigation phase is your most critical responsibility.
Choosing a Fumigation Provider
Selecting the right company is the first step toward a safe and effective outcome. You're not just hiring someone to tent your house; you're hiring a partner for a dangerous procedure that requires impeccable execution and follow-through.
- State License & Certification — Verify the company holds a current, specific fumigation license from your state's pesticide regulatory body. General pest control licenses may not suffice.
- Insurance & Bonding — Ensure they carry ample liability insurance. Fumigation errors can lead to property damage or even neighbor exposure, so financial protection is vital.
- Detailed Protocol & Communication — The best providers offer exhaustive pre-treatment checklists, clear timelines, and post-treatment guidance. They should explain the aeration verification process explicitly.
- Local Experience & Reputation — Choose a company familiar with your home's construction type (e.g., stucco vs. wood siding) and local pest species. Read reviews specifically about their fumigation follow-up.
Navigating this vetting process can be overwhelming. A resource like HomeProMatcher simplifies it by connecting you with pre-screened, licensed local professionals who specialize in fumigation, ensuring you start with a qualified partner.
Post-Fumigation Safety Protocols
Re-entering your home after fumigation is not like returning from a vacation. The gas may be below regulatory thresholds, but a structured re-entry protocol is essential for your family's health.
Always wait for the fumigator's official clearance before even approaching the property. They will provide a written or verbal "all-clear" based on their gas monitors. Do not rely on the absence of the tent as your signal.
Once cleared, follow this sequence:
- Initial Ventilation Check
Open all windows and doors upon entry to encourage any possible residual gas pockets to dissipate. Run the HVAC system fan for several hours to circulate air, even if the fumigator says levels are safe.
- Inspect for Physical Hazards
The tenting process can stress roof tiles, vents, and seals. Check for any minor damage or debris left by the company. Ensure all utilities are functioning normally.
- Handle Sealed Items
Unseal any food, medicines, or valuables you protected in special bags or containers. Inspect the seals for integrity. If any bag was compromised or you have doubt, discard the contents. The cost of replacement is far lower than the risk of exposure.
Watch Out
Never re-enter the home early out of curiosity or convenience. Sulfuryl fluoride exposure can cause neurological symptoms, nausea, and respiratory irritation. Children and pets are especially vulnerable. The legal clearance level is 5 parts per million (ppm), but sensitive individuals may react below that.
Your first 24 hours back in the home should be observational. Note any unusual odors (though the gas is odorless, other compounds might be present), feelings of dizziness, or pet behavior changes. If anything seems off, contact the fumigation company immediately and consider temporary relocation until they can re-test.
Cleaning After Fumigation
A thorough cleaning is mandatory after fumigation. The gas does not leave residues on surfaces, but the process itself introduces dust, and the psychological need to "reset" your living space is strong. A proper clean also allows you to inspect for any surviving pests or new signs of activity.
Cleaning after fumigation is about creating a safe, healthy environment and conducting a thorough inspection for treatment success. It's a functional process, not just cosmetic.
Focus your cleaning efforts in this order:
- All Horizontal Surfaces — Wipe down all countertops, tables, shelves, and floors. Gas circulates everywhere, and dust settlement is common. Use a damp cloth or mop; avoid dry dusting that could aerosolize particles.
- Soft Materials & Textiles — Wash all bedding, curtains, couch covers, and removable fabric items. While the gas won't adsorb into fabrics like odors, cleaning removes any particulate matter and provides peace of mind.
- Food Preparation Areas — Give your kitchen extra attention. Clean inside cabinets, drawers, and the refrigerator. Discard any unsealed food items as a precaution.
- Ventilation Systems — Replace HVAC filters. Consider having air ducts cleaned if you suspect heavy infestation or if the fumigation was particularly intensive.
Many homeowners wonder about the cost of post-fumigation cleaning. It's wise to budget for a professional deep clean, especially if the infestation was severe or you have health sensitivities. This can cost an additional $200 to $600, but it ensures no corner is overlooked. You can use a service matching platform like HomeProMatcher to find reputable cleaning services familiar with post-fumigation protocols, streamlining the recovery process.
Advantages of Professional Post-Fumigation Cleaning
- Expert Inspection — Professionals may spot early signs of treatment failure you'd miss.
- Health Assurance — They use equipment and methods that ensure all surfaces are safe for contact.
- Time Savings — They can complete the intensive clean in hours, not the days it might take you.
Disadvantages of DIY Cleaning Only
- Incomplete Risk Mitigation — You might miss critical areas like high shelves or inside vents.
- Physical Strain — The cleaning scope is large and exhausting after a stressful relocation.
- No Verification — You lack the trained eye to identify if pest activity persists.
Verifying Success & Preventing Reinfestation
The core purpose of fumigation is total eradication. Verification isn't automatic. You must become an active observer in the weeks and months following the treatment.
In the first week, conduct a deliberate inspection. Look for dead pests—this is a good sign. Termite fumigation should result in visible dead termites in windowsills or on floors. However, the absence of dead pests doesn't mean failure; the gas kills them in their galleries. Look instead for the cessation of live activity. No new termite swarmers, no live cockroaches at night, no new frass (termite droppings).
Did You Know?
Most fumigation companies offer a warranty or guarantee, often for 1 to 5 years. This warranty typically states that if the same pest species reappears within the period, they will re-treat at no cost. Understand the exact terms—some warranties exclude new infestations from different colonies or require annual inspections.
Preventing reinfestation requires addressing the root causes. Fumigation kills the current invaders but does nothing to stop new ones from finding the same attractive conditions.
- Remove Food & Water Sources — Fix leaks, ensure proper drainage, store food in sealed containers, and manage garbage meticulously.
- Seal Entry Points — Repair cracks in foundations, seal around utility lines, and ensure screens are intact. This is especially critical for drywood termites, which can enter through attic vents.
- Modify Habitat — Keep vegetation trimmed away from the structure, remove wood piles or debris near the home, and ensure the soil grade slopes away from the foundation.
- Schedule Follow-Up Inspections — Even with a warranty, hire a different pest control professional for an annual inspection. A second opinion provides unbiased verification of the fumigation's long-term success.
This multi-step verification and prevention plan turns a single fumigation event into a lasting solution. It protects your investment of several thousand dollars and secures your home's structural health.
Costs and Planning
Fumigation is a significant financial undertaking. Understanding the cost breakdown helps you budget accurately and avoid surprises.
| Cost Factor | Low-End Impact | High-End Impact | Notes |
|---|---|---|---|
| Size of Structure | $1,500 | $8,000+ | Primary cost driver; based on cubic feet under tent. |
| Geographic Location | +10% | +25% | Prices higher in coastal, urban, or high-demand areas. |
| Pest Type & Severity | Standard Rate | +15% | More gas or longer duration may be needed for severe infestations. |
| Pre/Post-Services | $200 | $1,000 | Includes preparation assistance, deep cleaning, or warranty inspections. |
| Warranty Length | 1 Year (Standard) | 5 Year (Premium) | Longer warranties often cost more upfront but provide value. |
Beyond the direct fumigation invoice, remember to budget for ancillary costs:
When planning, timing is also key. Fumigation can be scheduled, but ideal periods are during mild, dry weather to facilitate safe aeration. Avoid rainy seasons. The entire process, from preparation to safe re-entry and cleaning, can displace you from your home for 5 to 7 days. Plan accordingly for pets, children, work, and sensitive belongings.
Example Fumigation Provider: Structural Pest Solutions
A regional specialist with 20 years of fumigation experience. They offer a comprehensive package including a detailed pre-prep guide, a 3-year warranty, and one post-treatment inspection. Their average cost for a 2,000 sq. ft. home is $4,200. They are known for thorough communication during the stressful process.
Getting Multiple Quotes
Never accept the first quote for a fumigation. The market varies widely. Get at least three detailed estimates. Each quote should break down costs by structure size, gas amount, labor, and warranty. Ask why their price differs from others. A lower price might mean a shorter warranty or less thorough aeration monitoring. A higher price might include valuable extras like assistance with preparation or a follow-up inspection. Comparing quotes forces companies to justify their value and helps you understand the service landscape.
Frequently Asked Questions
Frequently Asked Questions
The fumigator will use gas monitoring equipment to determine when concentrations fall below the legal safety threshold (typically 5 ppm). This usually occurs within 6 to 12 hours after aeration begins. Only re-enter after they give you explicit, official clearance. Never assume safety based on time alone.
It is a recommended best practice. While the fumigant gas itself does not adhere to fabrics like an odor, the process introduces dust and particulate matter. Washing textiles removes any potential contaminants and provides psychological comfort. It's especially prudent for items used by children or individuals with respiratory sensitivities.
Contact the fumigation company immediately. This could indicate treatment failure, a new infestation from a different colony, or pests that were in an area with poor gas penetration (like a tightly sealed container). Your warranty should cover retreatment for the original pest species. Document the finding with photos.
The gas itself is non-staining and non-corrosive. However, the physical process of tenting can potentially stress roof tiles, vents, or delicate exterior finishes. Professional companies take precautions. Damage to belongings usually only occurs if you fail to remove or properly seal sensitive items as per their pre-fumigation checklist.
Typically, no. Homeowners insurance covers sudden, accidental damage (like a fire). Pest infestation is considered a maintenance issue. However, if the fumigation process accidentally causes direct physical damage to the structure (e.g., a torn roof tile causing a leak), that damage might be covered. Always clarify with your insurer and the fumigator's liability coverage.