Why Choosing the Right Roofing Contractor Matters
Your roof is the single most important barrier between your family and the elements. A properly installed roof lasts 20 to 50 years depending on the material — but a poorly installed one can fail in as little as five, leading to water intrusion, mold, structural rot, and insurance headaches that cost far more than the original job. Roofing is also one of the most heavily targeted home improvement categories for contractor fraud, with storm-chasing scammers and unlicensed operators collecting deposits and disappearing every year across the country.
The good news: vetting a roofer is not complicated if you know what to look for. This guide walks you through five evidence-based steps that separate reputable contractors from fly-by-night operations, plus a full breakdown of materials, costs, and what to expect throughout the project.
Important
After any major storm, do not sign anything presented at your door from a contractor you did not contact first. Storm chasers often arrive within hours, pressure homeowners to sign "assignment of benefits" contracts, and then perform substandard work — or none at all. Always initiate the contractor search yourself.
Key Roofing Industry Statistics
The roofing industry employs more than 230,000 workers in the United States and generates roughly $56 billion annually. That scale means there is no shortage of qualified professionals — but it also means there is no shortage of bad actors. Understanding how to separate the two is the core skill this guide will give you.
Step 1: Verify Licensing and Insurance
Before any contractor sets foot on your roof, confirm two things: they hold a valid state or local contractor's license, and they carry both general liability insurance and workers' compensation coverage. These are not formalities — they are the financial safety net that protects you if a worker is injured on your property or if the contractor's negligence damages your home.
-
Confirm the license number
Ask for the contractor's license number and verify it directly on your state's licensing board website. Most states have a free online lookup tool. A legitimate contractor will hand over this information without hesitation.
-
Request certificates of insurance
Ask for a certificate of insurance (COI) naming you as the certificate holder. The COI should show general liability coverage of at least $1 million per occurrence and workers' compensation covering all employees and subcontractors.
-
Call the insurer directly
Certificates can be forged. Call the insurance company listed on the COI to confirm the policy is active and the coverage amounts are accurate. It takes five minutes and can save you from enormous liability.
-
Check for manufacturer certifications
Top shingle manufacturers like GAF, Owens Corning, and CertainTeed offer tiered contractor certification programs (GAF Master Elite, Owens Corning Platinum Preferred, etc.). Certified contractors receive specialized training and can offer extended system warranties — often 50 years — that uncertified installers cannot.
In states like Florida, Texas, and California, roofing licenses are issued at the state level and are easy to verify online. In states with less centralized licensing (some Midwestern states), check with your county or municipality. Never accept verbal assurances alone — always verify in writing.
Step 2: Check References and Online Reviews
A roofer who has been in business for five or more years in your community will have a trail of completed projects you can investigate. Fresh paint on a new company truck means nothing — a portfolio of satisfied customers in your zip code means everything.
Request at least three local references from jobs completed in the past two years. When you call those references, ask: Did the crew show up on time? Did the final price match the estimate? Did they clean up debris daily, including nails in the driveway? Would you hire them again? The answers to those four questions will tell you almost everything you need to know.
For online reviews, check Google Reviews (the most reliable volume source), the Better Business Bureau, and Angi (formerly Angie's List). Look for patterns rather than individual outliers — a contractor with 200 reviews averaging 4.6 stars is far more trustworthy than one with 12 reviews averaging 4.9. Also look specifically for how the company responds to negative reviews: a professional, solution-oriented response to a complaint is actually a positive signal.
Did You Know?
The National Roofing Contractors Association (NRCA) maintains a member directory at nrca.net. NRCA member companies agree to uphold professional and ethical standards. Membership is not a guarantee of quality, but it is one more positive data point in the vetting process.
Step 3: Get Multiple Written Estimates
Get at minimum three written estimates before making a decision. "Written" is the key word — verbal quotes are meaningless. A proper roofing estimate should include: the scope of work in plain language, a complete material list with brand names and product lines, the number of layers to be removed, whether decking replacement is included (and at what per-sheet cost if additional is needed), the total price, and the payment schedule.
Be skeptical of estimates that are dramatically lower than the others. It usually means the contractor is cutting corners on materials, skipping underlayment, planning to layer over existing shingles (often against building code and always bad practice), or using unlicensed day laborers without workers' comp coverage. It can also mean they plan to hit you with "surprise" charges once the job is underway and you have few options.
The lowest estimate is not always the best deal. Compare the scope and materials across all three bids. A $2,000 difference in price might represent $3,000 in materials being cut from the job — which you will pay for with a roof that fails years early.
Step 4: Understand the Contract
Never pay for a roofing job without a signed written contract. A legitimate roofing contract should cover every material detail of the project before work begins. Review these elements carefully:
- Complete scope of work — What exactly is being removed, replaced, and installed? Does it include flashing replacement at chimneys, skylights, and walls? Ice and water shield in valleys?
- Materials specification — Brand, product line, color, and warranty tier for shingles, underlayment, ridge cap, ventilation components, and any metal work.
- Payment schedule — A standard schedule is 10–30% upfront (for material deposits), the remainder upon satisfactory completion. Never pay more than 30% upfront, and never pay the final balance until the job passes inspection and all debris is removed from your property.
- Timeline and working hours — When does work start? What hours? How many days is the project expected to take?
- Permit responsibility — Most jurisdictions require a permit for full roof replacement. The contractor should pull the permit, not ask you to do it — this is an important liability protection for you.
- Warranty terms — Both the manufacturer's material warranty and the contractor's labor warranty should be spelled out in writing. Workmanship warranties typically run 1–10 years; manufacturer warranties can run 25–50 years with certified installers.
- Cleanup and disposal — Who is responsible for daily debris removal? How is the old roofing material disposed of, and who pays the dump fees?
Important
Never sign an "assignment of benefits" (AOB) agreement that transfers your insurance claim rights to the contractor. In states where this is legal, it has led to widespread fraud. Your contract should be between you and the contractor — not your insurance company and the contractor.
Step 5: Watch for Red Flags and Storm Chasers
Roofing scams spike dramatically after major weather events. Out-of-state contractors with no local address, rented trucks with magnetic signs, and high-pressure tactics are the clearest warning signs. But there are subtler red flags too:
- Refusal to provide a written estimate or contract
- Demanding full payment upfront
- Offering to "waive your deductible" — this is insurance fraud in most states
- No physical business address (a PO box does not count)
- Inability to provide proof of insurance on request
- Pressuring you to decide today with a "limited time" discount
- Asking you to sign before they perform a "free inspection"
- No online presence, reviews, or verifiable history
Great News
Filing a complaint against a fraudulent contractor is easier than most homeowners realize. Contact your state attorney general's consumer protection office, your state contractor licensing board, and the Better Business Bureau. Many states have restitution funds that can compensate victims of contractor fraud.
Roofing Materials Comparison
The material you choose affects not just upfront cost but long-term durability, energy efficiency, maintenance requirements, and your home's resale value. Here is how the most common options stack up:
| Material | Lifespan | Cost per Sq Ft (installed) | Best For | Notes |
|---|---|---|---|---|
| 3-Tab Asphalt Shingles | 15–20 years | $3.50–$5.50 | Budget-conscious replacements | Lowest cost, least wind resistance (60–70 mph) |
| Architectural Asphalt Shingles | 25–30 years | $4.50–$7.50 | Most US homes | Best value; 110–130 mph wind ratings common |
| Impact-Resistant Shingles | 25–30 years | $6.00–$9.00 | Hail-prone regions | May qualify for insurance discount (5–30%) |
| Metal Roofing (standing seam) | 40–70 years | $10.00–$18.00 | Long-term investment, all climates | Excellent in snow, hail, and high wind zones |
| Wood Shake / Cedar | 20–30 years | $8.00–$14.00 | Curb appeal, dry climates | High maintenance; restricted in fire-prone areas |
| Clay or Concrete Tile | 40–50 years | $10.00–$20.00 | Southwest, Mediterranean styles | Heavy — requires structural verification first |
| Slate | 75–150 years | $20.00–$40.00 | Historic homes, premium builds | Extreme longevity; requires specialized installers |
Average Roof Replacement Costs
Roofing costs vary significantly by region, pitch complexity, and material choice. These rate highlights reflect 2024 national averages for a 2,000 square foot single-story home with a standard 4:12 pitch:
Factors that increase cost beyond the base estimate include: steep pitch (anything above 6:12 adds 20–50%), multiple story access, chimney flashing replacement ($300–$700), skylight flashing or relocation, ice and water shield requirements in cold climates, and decking replacement if the existing plywood or OSB is water-damaged or rotten (typically $70–$100 per sheet).
If your insurance adjuster has already assessed storm damage, share that report with each contractor you get a bid from. A legitimate contractor will work within the insurance scope or document in writing why additional repairs are needed — not pressure you to "upgrade" to something the insurance company should not be paying for.
DIY vs. Professional Roofing
Pros of Professional Installation
- Full manufacturer warranty remains valid
- Workmanship warranty covers labor defects
- Licensed contractor pulls required permits
- Workers' comp protects you from liability
- Proper flashing, underlayment, and ventilation installed correctly
- Correct disposal of old materials
- Work completed in days, not weeks
Cons of DIY Roofing
- Voiding manufacturer warranty on materials
- Falls are the #1 cause of construction fatalities
- No permit = problems at resale or insurance claim
- Improper installation leads to leaks and early failure
- Renting equipment offsets most of the "savings"
- Mistakes are expensive to fix and may require full redo
- Takes most DIYers 2–4× longer than estimated
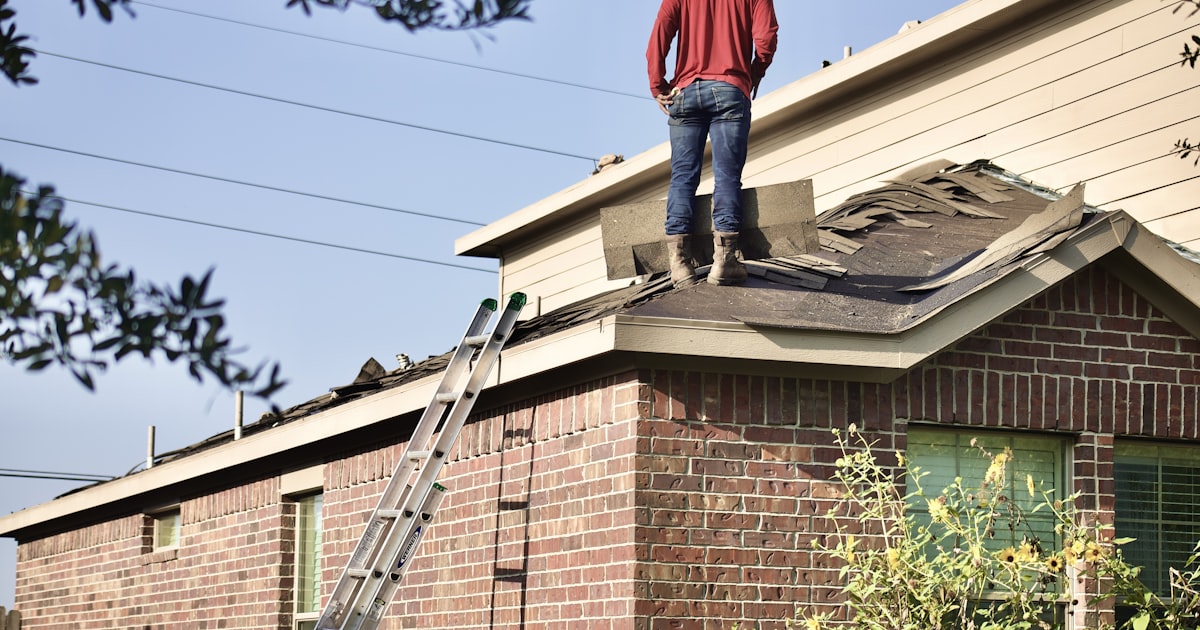
The short version: for minor repairs (replacing a few shingles, resealing flashing), a competent DIYer can reasonably handle the work. For a full replacement, the financial math rarely favors DIY once you factor in equipment rental, material waste, permit fees, and the risk of costly mistakes — not to mention the very real safety hazard of working on a pitched surface.
Frequently Asked Questions
Most residential roof replacements on a standard single-story home take one to three days for an experienced crew. Larger or more complex roofs (multiple stories, steep pitch, extensive flashing work) may take three to five days. Weather delays are always possible. A good contractor will give you a realistic timeline upfront and communicate any changes promptly.
You do not need to be present for the entire project, but you should be available on the first day for a walkthrough and to answer any questions, and on the final day for a completion inspection. Make sure your contractor has a way to reach you. Before work begins, move vehicles out of the driveway, warn your neighbors, and secure outdoor items that could be damaged by falling debris.
In most jurisdictions, building code allows a maximum of two layers of shingles. Installing a second layer over the first (a "re-roof" or "overlay") is cheaper upfront but is not recommended. The added weight stresses your decking, the existing shingles create an uneven surface, you lose the ability to inspect the decking for rot, and the new shingles will not lie as flat — reducing both aesthetics and wind resistance. A full tear-off is almost always the better long-term value.
Insurance typically covers sudden damage from storms, hail, fire, or falling objects. It generally does not cover damage from wear and tear, poor maintenance, or a roof that has simply reached the end of its useful life. Many insurers are tightening coverage requirements for older roofs — some will only pay actual cash value (depreciated) rather than replacement cost value for roofs over 15–20 years old. Review your policy and speak with your agent before assuming your replacement is covered.
A repair makes sense when damage is isolated — a section of missing shingles after a storm, a single area of flashing failure, a small leak around a pipe boot. A replacement makes sense when the roof is approaching or past its designed lifespan, when more than 25–30% of the surface is damaged, when granule loss is widespread, when decking rot is extensive, or when you are dealing with recurring leaks that repairs have not permanently resolved. Get a professional inspection — most reputable roofers offer them free of charge — before committing to either path.
Late spring through early fall is typically ideal — temperatures are moderate, rain is less frequent, and crews are working efficiently. However, roofing can be performed year-round in most climates. Winter replacements are possible but require care; asphalt shingles need a minimum temperature (around 40°F) to seal properly. Some contractors offer slight off-season discounts in late fall and winter when demand slows.